
Packing glass items for storage – how to prepare
get a quote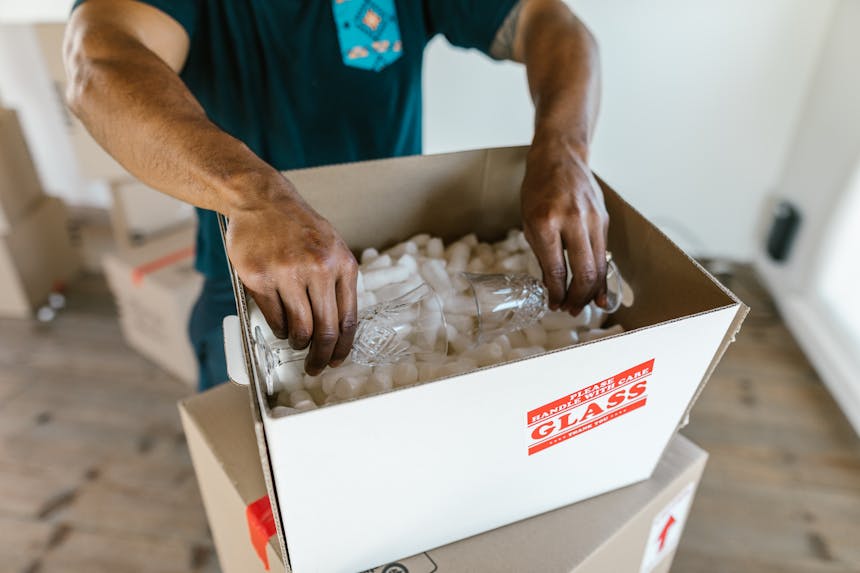
Glass items require careful handling and strategic packing to prevent damage during storage. Without proper preparation, they can easily crack, chip, or break. Ensuring their safety involves selecting the right packing materials, using appropriate wrapping techniques, and organizing them securely in a self storage Seattle unit. This comprehensive guide will take you through every step of packing glass items for storage, starting with how to prepare.
Selecting the right packing materials
To ensure glass items are well-protected, gathering high-quality packing supplies is essential:
- Bubble wrap – offers cushioning and absorbs shocks from movement.
- Packing paper/newspaper – prevents direct contact between glass surfaces and provides initial wrapping protection.
- Packing peanuts or foam inserts – fill empty spaces in boxes to keep items from shifting.
- Corrugated cardboard sheets – create barriers between glass items to prevent friction and impact damage.
- Packing tape – secures wrapping and reinforces boxes.
- Sturdy boxes – choose thick, double-walled cardboard boxes or plastic containers for maximum durability.
- Dividers – essential for separating glassware and stemware.
- Markers and labels – clearly label boxes as “Fragile” to ensure careful handling.
The right materials provide cushioning, prevent movement inside boxes, and minimize the risk of damage!

Cleaning and inspecting glass items
Before packing, each glass item should be thoroughly cleaned to remove dust, smudges, or residue. A microfiber cloth or a soft sponge with mild dish soap is ideal for cleaning glass without causing scratches. If items are washed, they must be completely dry before packing to prevent moisture buildup, which can lead to mold or weakened packaging.
Carefully inspect each piece to identify pre-existing damage such as cracks, chips, or weak spots. Reinforce items with minor cracks with painter’s tape to reduce stress on the fragile area during storage in the Renton self-storage unit. Severely damaged glass items should be wrapped separately or, if too fragile, considered for repair before storage.
Wrapping techniques for maximum protection
Proper wrapping techniques create a protective barrier around glass items, reducing the risk of impact damage. The first layer of protection involves wrapping each item in packing paper or soft tissue paper, which prevents direct contact with bubble wrap and minimizes the risk of scratches. Once wrapped in paper, cover the item with multiple layers of bubble wrap, cushioning all sides. The more fragile the item, the thicker the bubble wrap layers should be.
For glassware and stemware, rolling the item in bubble wrap and securing it with packing tape prevents unwrapping during storage. Hollow items such as vases and glass bowls require extra care; stuffing the interior with crumpled packing paper or foam inserts helps maintain structural integrity. You should wrap flat glass items, such as mirrors or glass tabletops, in bubble wrap, cover them with a layer of cardboard, and then wrap them again for added stability.
When wrapping multiple glass items of the same shape, each piece must be individually wrapped before stacking. Placing a layer of bubble wrap or cardboard between stacked items further reduces the risk of contact damage.

Packing glass items in boxes
Careful arrangement inside storage boxes ensures that glass items remain stable and well-cushioned in Bellevue self-storage. Heavier glass pieces should always be at the bottom of the box, with lighter and more delicate items on top. Filling empty spaces with packing peanuts, foam inserts, or crumpled paper prevents movement inside the box, minimizing the risk of breakage.
When packing glassware, using dividers helps keep individual pieces separated and protected. For extra safety, placing smaller wrapped items inside a secondary box before placing them in a larger storage container creates an additional protective layer. This technique, known as “Double boxing,” is especially useful for valuable or extremely fragile glass objects.
Once you complete packing glass items for storage, shake the box gently to determine if there is any internal movement. If shifting occurs, add more packing material to fill gaps. Then, seal the box securely with strong packing tape, reinforcing all edges and seams. Clear labels indicating “Fragile” and “This side up” should be prominently displayed on all sides of the box to ensure careful handling.
Choosing the right storage location
Storage conditions have a significant impact on the longevity of glass items. Extreme temperature fluctuations can cause the glass to expand and contract, leading to cracks or weakening over time. A temperature-controlled storage space with stable temperature and humidity levels is ideal for preserving glassware.

Stacking boxes containing glass requires careful consideration. Never place heavy boxes on top of fragile glass containers. Instead, store glass boxes on sturdy shelves or in a location where you’re unlikely to crush them or knock them over. If stacking is unavoidable, placing a wooden or plastic board between boxes distributes weight more evenly and reduces pressure on the contents.
Direct sunlight can cause certain types of glass to fade or become brittle over time. Keeping glass items in a shaded or covered storage area prevents exposure to UV rays. If storing in a basement, garage, or attic, taking extra precautions such as waterproof plastic bins and silica gel packets can help prevent moisture damage.
Retrieving and unpacking glass items
When retrieving glass items from your Seattle mini storage, handling them with care is just as important as the packing process. Carry the boxes with both hands, avoiding tilting or dropping them. When opening a box, removing packing material gradually helps prevent accidental breakage. Lift items one at a time, rather than grabbing multiple pieces at once.
When packing glass items for storage long-term, periodically checking on stored glass items ensures they remain in good condition. Inspecting for signs of damage, moisture buildup, or shifts in placement allows for timely adjustments that can prevent future issues.